1. Open Flash and create a New Document.
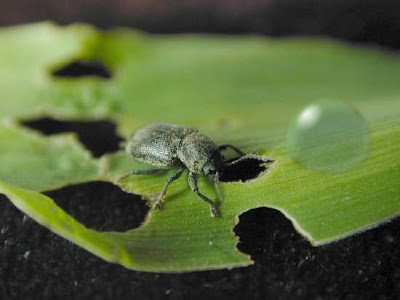
2. Find a picture you want to use as your background. I am using this picture of a leaf. Import it into the Library and then drag it onto the stage. Adjust the stage size so that it is the same size as the picture and then ensure that the picture is centred on the stage (Ctrl+K then align). Name the layer "Bkg".
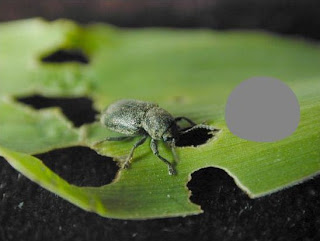
3. Create a new layer called "Mask". On this layer you need to draw the water droplet. I used the Oval Tool to create a circle then squashed the bottom.

4. Select the droplet you just made and copy it. Create a new layer called "WaterDroplet" and paste the droplet in place (Ctrl+Shft+V). Drag the "WaterDroplet" layer so that it is in between the "Mask" layer and the "Bkg" layer.
5. Right-click on the "Mask" layer and click 'Mask'. Then hide the "Mask" layer, unlock the "WaterDroplet" layer and lock the "Bkg" layer.

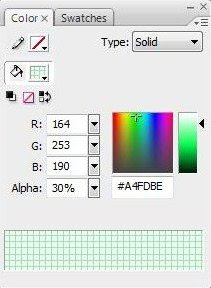
6. You now need to add some colour to the droplet. The colour you choose is important in making it look realistic. Select the droplet on the "WaterDroplet" layer you have just unlocked. Determine the root colour of the background underneath the droplet. So, in this example it will be a bright green (settings shown in image below). Fill the droplet with the Paint Bucket Tool (K) with the colour selected. Now reduce the Alpha to 30%.

7. Convert the droplet to a movieclip (F8) and then name it "Droplet".
8a. Now we are going to apply several filters to make it look like water. First, add a Bevel with the following settings:

Blur X: 20
Blur Y: 20
Strength: 200%
Quality: High
Shadow: #66CC00 (Alpha: 50%) THIS ALSO NEEDS TO BE A SIMILAR COLOUR TO THE BACKGROUND!
Highlight: #FFFFFF (Alpha: 0%)
Angle: 225
Distance: 25
Type: Inner
8b. Add another Bevel.

Blur X: 20
Blur Y: 20
Strength: 200%
Quality: High
Shadow: #CCFFFF
Highlight: #CCFFFF
Angle: 45
Distance: 25
Type: Inner
8c. Then add a Drop Shadow.

Blur X: 2
Blur Y: 2
Strength: 100%
Quality: High
Colour: #000000 (Alpha: 50%)
Angle: 225
Distance: 20
Inner Shadow: YES
8d. And another.

Blur X: 5
Blur Y: 5
Strength: 1000%
Quality: High
Colour: #000000 (Alpha: 25%)
Angle: 45
Distance: 5
9. Add a small oval onto the water droplet in the same direction as the light source and angle it appropriately. Fill it with a Radial Fill (White - Alpha: 100% & White - Alpha: 0%). Convert it into a movieclip and give it a High quality Blur of 5 for X and Y. Place it on the "WaterDroplet" layer above the water droplet itself.
10. There you have it, a nice looking water droplet! I have also added a slight blur on top of the previous filters to give it a softer edge. If you do this you will also need to make the droplet on the "Mask" layer slightly larger so that the blur isn't cut off.
.jpg)
.jpg)
No comments:
Post a Comment